Thursday, 7 July 2011

Class photo.

I can't believe time's gone by so fast. I just feel like should go to school next Monday. We just made two different boats but I think we have leant a lot. To me, it's really good experienced of my career. We are good taem I think. I'll miss this class. Thanks Chris and Thanks everyone ~! 

Glassing outside of the boat.

https://docs.google.com/document/d/1QFQbyxhV7-31gdc2BqULuDzlRotzG0sBQbeEmciY1iQ/edit?hl=en_US#

I made this process as a manual in goolgle docs.

Friday, 1 July 2011

attaching deck to the hull.


Before we attach deck to the hull, we fixed B/H which is stn 11 because the flange which made for this B/H would not work. Thus, we made holes on the B/H for putting some glue to attach the hull. After that, we put some glue on the flange which is on the top side and transom as well. After attach the deck to the hull, we made some piece of block to push the deck to the flange like the picture as aboved. However the problem is that the B/H which i made and cut off is not touch the side deck. I thought it's going to be down but it wasn't. Thus, I realised that i should find out how the side deck going to be done. When we turn the boat over, I found some gap and over glueing which we have to sand it off. Hence, next time we need to plane and sand to take this off as well as filll in the gap.

Saturday, 11 June 2011

flange of the girder.

First of all, we made a plate for girder.
After make the plate, we figured out how to attach it on the girder, so first, we needed some flat place for setting it up. we took some saw bench and put straight edge on. Using the masking tape to level for the girder, make sure it's straight, chek it several time it dosen't move when you're working on it. Lastly, glue and cove it.

Tuesday, 31 May 2011

flange.

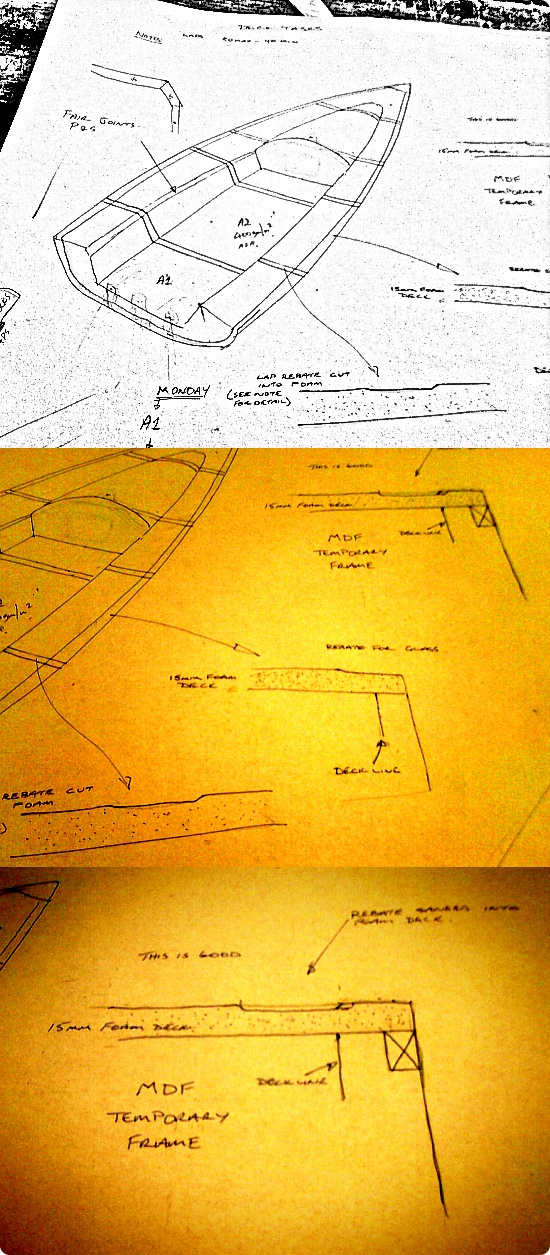
Today, I asked Chris to the flange of top side that how it going to be done because I knew it but wasn't quite sure. Chris explained to me as he was sketching. I like this. First of all, we talked about the purpose of the flange. I was thinking it's supporting things when we attach something. For example, if we attach deck to hull, we need to something hold it otherwise it might fall down or crush, so we made temporary flanges and then we are going to cove it underneath as well as glss laminate. We also talked about problem solving. Chris told me that it is typical teaching style of kiwi. When they working on something, they always try to think and challenge for solving problems themselves. However it is unsual to me because we were educated follow teacher. They nomally tell us what to do something and we don't have many question and challenge during the class. Anyway I realised that this way improve our problem-solving as well as creativity.
In addition, we don't forget the knowledge well and to be able to keep that memory for a long time.

Monday, 30 May 2011

deck


Before the deck vacuum, we need to make the rebates so we figured out how many and where is going to be then make a sanding block to sand foam down. Why we make the rebate is that if we glass on it the two glass which is atf and foward going to be overlaped so make it fair surface. After that, we started vacuuming with we prepared for that. When you put resins on the glass and peel play, you make sure that air free.

Vacuuming floor - you can see the nice cove of this picture, after cove the floor, we prepared to vacuum the floors. It's same way when we was vacumming the other thing exept the uni carbon. The stack is that uni carbon - glass lami - peel ply - perf plastic - mash - vacuum bag. You need to make the vacuum bag being wide enough. Otherwise you cannot have enough room for wrinkle.